How to Root Oppo Neo 5 without Computer (APK ROOT without PC)
As we all know after rooting we will get more control over our device. And we can customize the phone as we want such as delete the unnecessary apps. block ads, speed up your device, extend the battery and so on. So more and more people are seeking the method about how to root their device. Here we highly recommend you a fast and easy root tool for you that is KingoRoot which offers the easiest and fastest Android rooting experience for almost all devices and has the highest success rate.
Before we root our Oppo Neo 5 device let's have a look at the specifications. The Oppo Neo 5 was launched in June 2015. It features a 4.50-inch touchscreen display and 1GB of RAM as well as 8GB of internal storage which can be expanded up to 32GB. The Oppo Neo 5 (2015) runs Android 4.4.2 operationg system and is powered by a 2000mAh non removable battery. The Oppo Neo 5 (2015) is a dual SIM (GSM and GSM) smartphone that accepts Micro-SIM and Nano-SIM. The Oppo Neo 5 is powered by 1.3GHz quad-core MediaTek MT6582 processor.
Root your Oppo Neo 5 Computer (APK ROOT without PC)
Before root please make both device preparations and knowledge preparations:
Device preparations:
- Make your device powered on
- At least 50% battery level
- Make a full backup of the important data in case of data loss caused by unforeseen circumstances.
- Internet connection(Wi-Fi suggested)
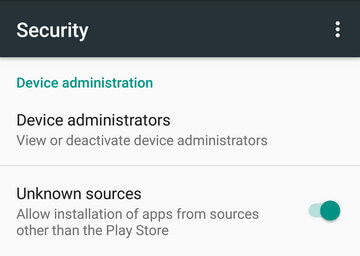
- Enable install from "Unknown Sources"
Knowledge preparations:
- Rooting is through exploiting system vulnerablities or security loopholes which will be marked as "Dangerous" by antivirus softwares. It is your decision to root it or not.
- Rooting risks: the data may be lost during the rooting process and may void your phone's warranty.
- Rooting benefits: After rooting you will be able to customize your device, save battery/power, block/remove ads, spped up/boost, uninstall/delete bloatwares, easy/effective backup and install/flash a custom Rom on your device.
After make good preparations you can root your device by following the tutorial step by step.
- Download KingoRoot.apk on your Oppo Neo 5.
- Install KingoRoot apk on your Oppo Neo 5 device then launch it.
- Click "One click root" to start rooting.
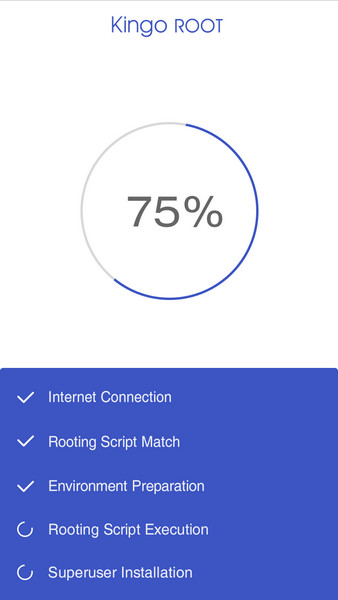
- Wait a few minutes till the result appears on the interface.
- Root Succeed

The download will automatically start. If there is a prompt about KingoRoot.apk, click "OK" to proceed.
If installation from "Unknown Sources" has not been enabled you will get a prompt "Install blocked" stating that "For security, your phone is set to block installation of apps obtained from unknown sources". Just follow the instructions and allow the device to install apps from "Unknown Sources".

KingoRoot is easy to use. Rooting will begin just by clicking "One Click Root" at the bottom of the interface,


If root fails please try it multiple times because there are multiple scripts integreted in the root apk and only runs one at a time. So please try it a few times to increase the success rate.
Note After several if it still fails please click here: How to Root Android with KingoRoot (PC Version)
KingoRoot on Windows
KingoRoot Android on Windows has the highest success rate. It supports almost any Android device and version.

KingoRoot for Android
KingoRoot for Android is the most convenient and powerful apk root tool. Root any Android device and version without connecting to PC.

Top Posts
- Successfully Get Root Access On Android 10 (Google Pixle 3 XL) With Magisk
- How to Root Android without Computer (APK ROOT without PC)
- How to Root Android with KingoRoot (PC Version)
- Best Top 5 Root Tools to Safely Gain Root Access for Your Android Devices
- How to Root Your Android 10.0 with Kingoroot root APK and PC root
- How to Root Your Android 5G with Kingoroot root APK and PC root
- How to Root Android 9.0 Pie with Kingoroot Both root APK and PC root Software
- How to Root Android 8.0/8.1 Oreo with KingoRoot APK and Root Software
- How to Root Huawei Packed with EMUI 8 and EMUI 9 or Higher with Magisk
- How to Root Samsung running Android 9.0 Pie with Magisk